Taxes
Table of Contents
To setup the taxes properly, you need to understand about Tax Rate and Tax Class.
Tax Rates
Tax Rate is used to define a tax based on customer groups and geo zone. A Tax Class includes multiple tax rates and it is assigned to a product to calculate the tax for that product.
Go to EShop -> System -> Tax Rates to access to Tax Rates section of EShop.
 Click on the New button on the toolbar OR click on the tax name on the list to create new/edit a tax.

| Property | Description |
|---|---|
| Tax Name |
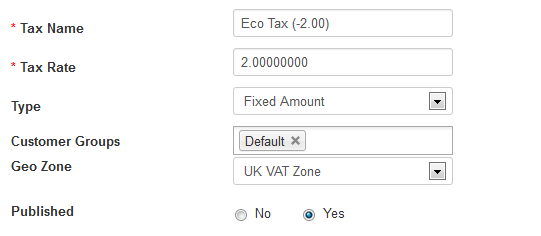
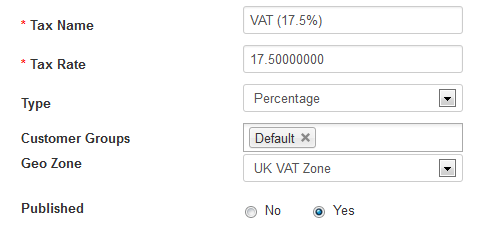
A name for the tax that will be displayed in the store front when taxes are added to order total. |
| Tax Rate | A number value for the tax. |
| Type | Determines whether the number value in Tax Rate is a fixed amount or a percentage of the total amount of an order. |
| Customer Groups | Selecting a customer group will add this tax to all the customers within this group. Multiple customer groups can be selected at once. |
| Geo Zone | Selecting a Geo Zone will apply the tax to the regions and countries within a Geo Zone. |
| Published | Published this tax rate or not. |
Tax Classes
Go to EShop -> System -> Tax Classes to access to Tax Classes section of EShop.

From the Tax Classes list, click on the New button on the toolbar OR click on the tax class name on the list to create new/edit a tax class.
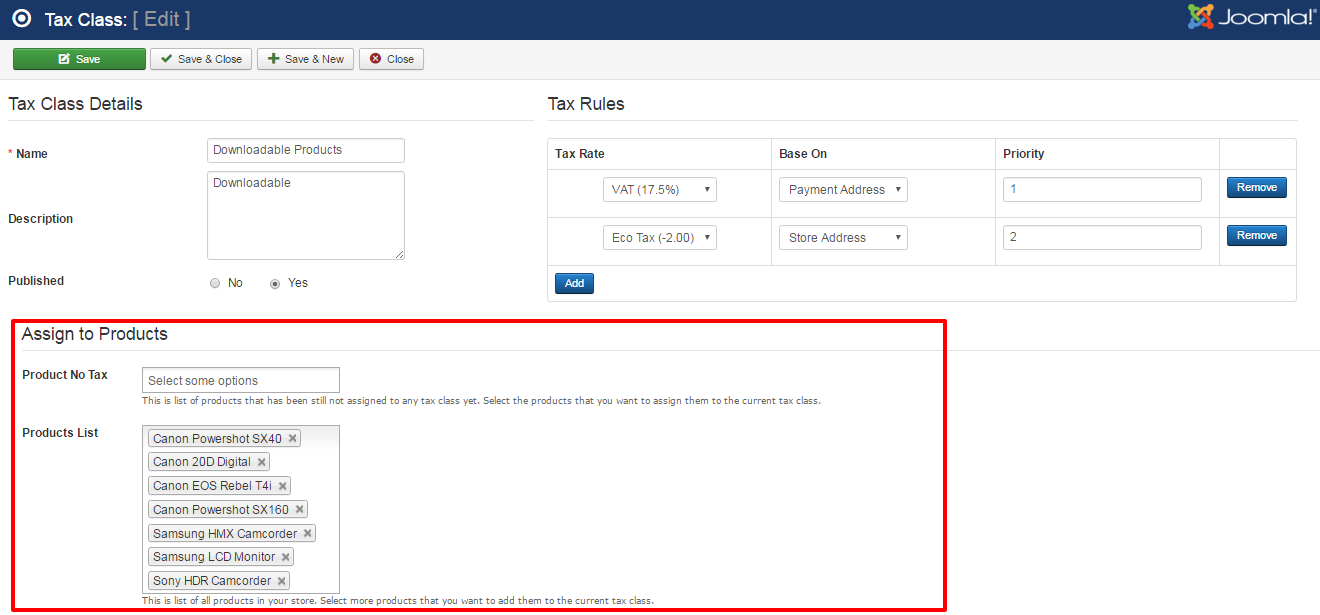
A tax class may includes many tax rates. Under Tax Rules on the right hand side, you should add tax rates for a tax class.

| Property | Description |
|---|---|
| Name | Name of Tax class. |
| Description | Description of tax class. |
| Published | Published this tax class or not. |
Assign tax class to products
Since version 2.0.3, we added the feature to allow admin to assign a tax class to products. This will save much of time because admin must not edit every products to choose tax class for them as before.
So on the edit tax class screen, you will see a new part called "Assign to Products". Under this parth, you should be able to choose products to assign the tax class to.

There are 2 type of products list that you can choose from:
- Product No Tax: This is list of products that has been still not assigned to any tax class yet. Select the products that you want to assign them to the current tax class.
- Products List: This is list of all products in your store. Select more products that you want to add them to the current tax class.
Steps to setup tax
Following is an example to setup tax for a product based on geo zone in a country (United Kingdom):
Step 1: Go to EShop -> System -> Zones section to manage zones for United Kingdom country. EShop has already had all zones for all countries over the world. You can edit or add more zones there if you want.

Step 2: Go to EShop -> System -> Geo Zones section to add geo zones for United Kingdom country. You can add multiple geo zones for a country, each geo zone includes multiple zones.

Step 3: Go to EShop -> System -> Tax Rates to add tax rates for geo zones based on customer groups. Each tax rate is assigned for one geo zone and one/multiple customer groups.

Step 4: Go to Tax Classes to add tax classes, each tax class include one or multiple tax rates. When assigning a tax rate to tax class, you have option to choose address type to calculate the tax. There are 3 of address types there:
- Store Address: If store address is chosen, then the system will based on store's address to calculate the tax (store address is defined under EShop -> System -> Configuration -> Local tab).
- Payment Address: If payment address is chosen, then the system will based on payment address to calculate the tax (payment address is entered by customer at Step 2 of checkout).
- Shipping Address: If shipping address is chosen, then the system will based on shipping address to calculate the tax (shipping address is entered by customer at Step 3 of checkout).

Step 5: Go to edit a product, under Data tab, look at Tax option and choose a tax class for that product.

Step 6: Enable tax:
Go to EShop -> System -> Configuration -> Options tab, look at Enable Tax option and choose Yes for it to enable the tax for your store.

In the case you use store address and default customer group to calculate the tax for your store, please go to EShop -> System -> Configuration: under Local tab, choose default Country and Region/State, under Option tab, choose default Customer Group for your store.
EU VAT Rules
What's EU VAT Rules?
- Home country's customers are charged VAT of Home country's Tax Rate.
- EU customers with no valid VAT number will be charged VAT of their country's Tax Rate.
- EU (Non Home country) customers with a valid VAT number are charged 0% VAT.
- Non EU customers are charged 0% VAT.
Enable EU VAT Rules
To enable EU VAT Rules in EShop, you must do the following steps:
Step 1: Go to EShop -> System -> Configuration -> Option tab, look at "TAXES" section:
- Enable EU VAT Rules: choose Yes
- EU VAT Rules based on: Choose Shipping Address or Payment Address. This Address is used to identify the country of customers.

Step 2: Go to EShop -> Sales -> Fields to make sure that field "eu_vat_number" is enabled there. You should also edit this field to choose Address type is Billing Address or Shipping Address based on "EU VAT Rules based on" that you chose in the configuration.

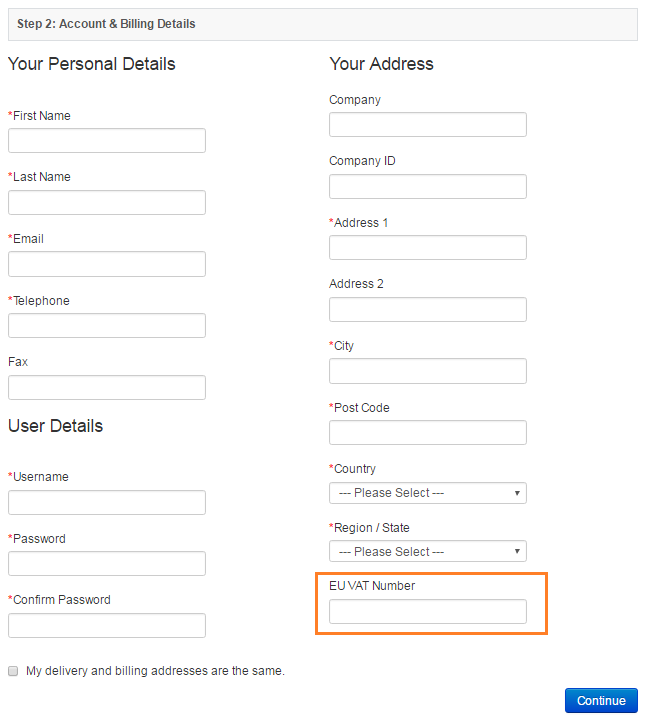
Once you enabled the EU VAT Rules, then there is a field called "EU VAT Number" in the Step 2 or Step 3 of Checkout to allow customer enter the EU VAT Number.
