PayULatam
Install EShop PayULatam
EShop PayULatam is an extra payment plugin in EShop. To have it on your store, you must go to EShop -> Plugins -> Payments and choose eshop_payulatam.zip package to install it (Read more about how to install payment plugin in EShop at http://eshopdocs.joomservices.com/plugins-and-themes/payment-plugins#install-a-new-payment-plugin)
Config EShop PayULatam
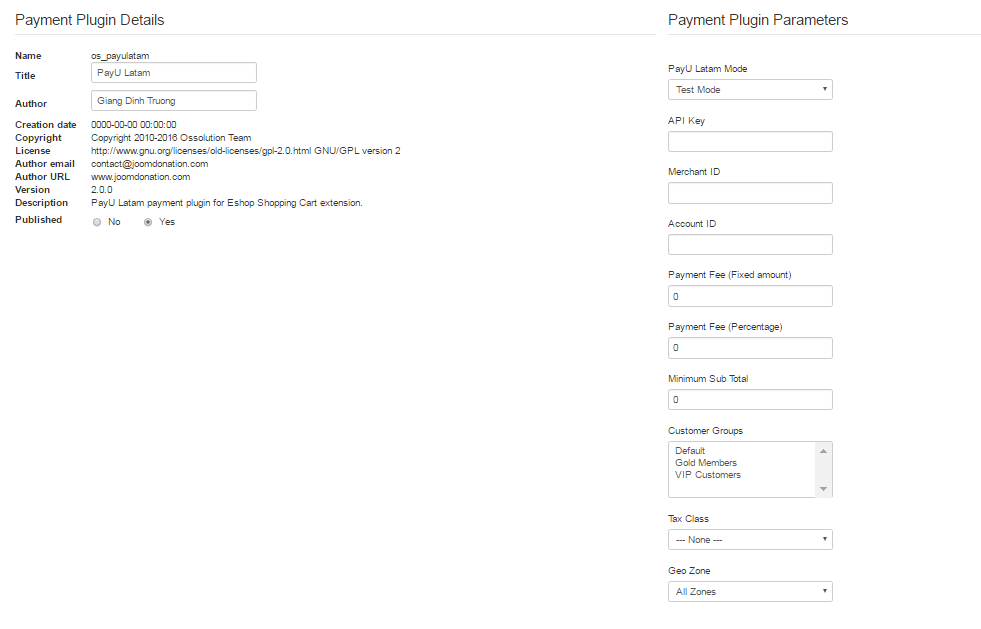
Go to EShop -> Plugins -> Payments, then click on os_payulatam to edit it

- PayULatam Mode: Set to Test Mode if you are testing the system and set it to Live Mode when you go live
- API Key: Enter the API Key of your PayULatam account.
- Merchant ID: Enter the Merchant ID of your PayULatam account.
- Account ID: Enter the Account ID of your PayULatam account
- Payment Fee (Fixed amount): Enter a fixed amount of payment fee.
- Payment Fee (Percentage): Enter a number of percentage of Sub Total as payment fee.
- Minimum Sub Total: Enter the sub total of order must reach to make the PayULatam to be available as a payment plugin. Leave it 0 if you don't want to use.
- Customer Groups: Choose the customer group(s) to make the PayULatam to be available with customers from that customer group(s). Don't choose any groups if you don't want to use.
- Tax Class: Choose a tax class for the payment plugin.
- Geo Zone: Choose a geo zone for payment plugin.
Payment Fee = Payment Fee (Fixed amount) + Payment Fee (Percentage) * SubTotal / 100