Events Booking - Google Spreadsheet
If you want to synchronize registrants of your events automatically to Google Spreadsheets, you can enable and use Events Booking - Google Spreadsheet plugin. Go to System -> Plugins, find and enable the plugin to use the integration. There are few setup steps needed for the synchronization to work:
Create a Google Cloud Project
- Go to the Google Cloud Console.
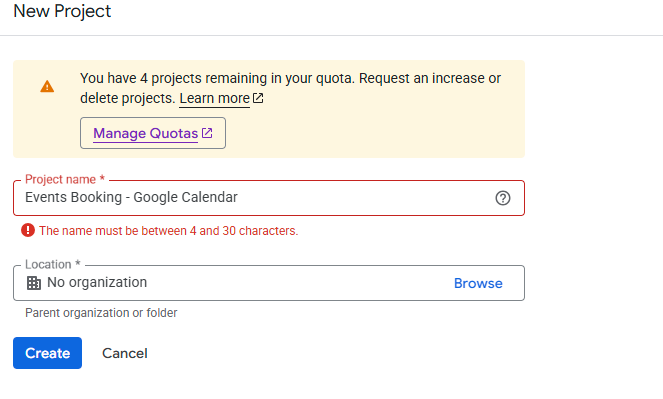
- Click Select a project → New Project.
- Enter a name (e.g.,
EB - Google Spreadsheet) and click Create.
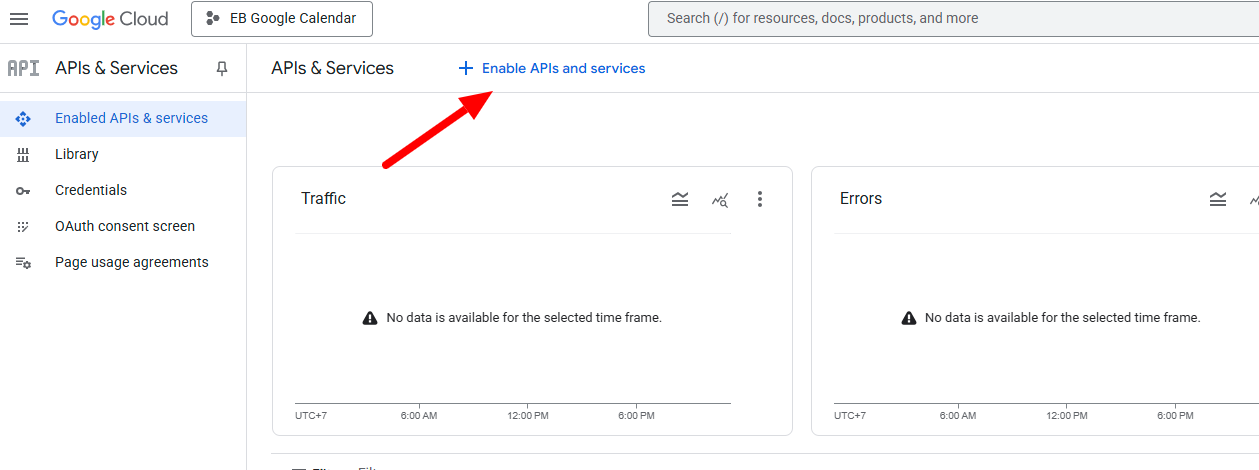
Enable the Google Sheets API
- Access to the project, then click on Enable APIs and services
- Search for Google Sheets API.
- Click Google Sheets API → Enable.
Create a Service Account
- Go to IAM & Admin > Service Accounts.
- Click + CREATE SERVICE ACCOUNT at the top.
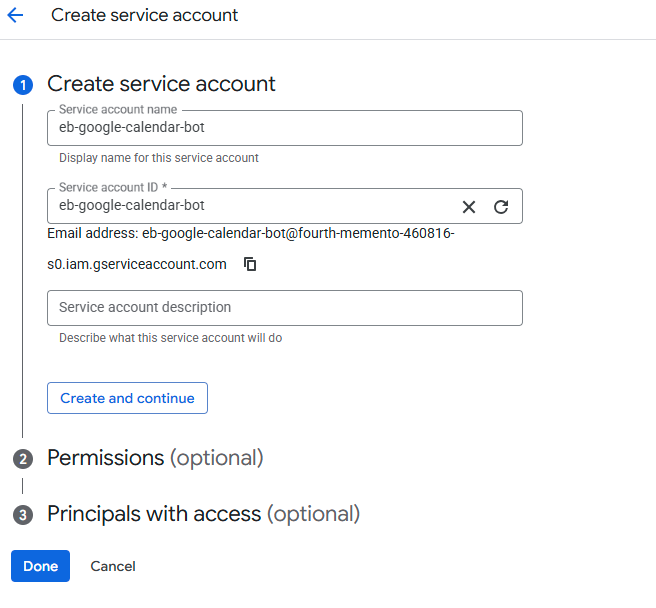
- Fill in the following:
- Service account name: (e.g.,
eb-google-calendar-bot) - Click Create and continue.
- Service account name: (e.g.,
- In the Grant this service account access to the project step, skip assigning roles and click Continue, then Done.
Create and Download a JSON Key File
- Find your new service account in the list and click on its name.
- Go to the Keys tab.
- Click Add Key → Create new key.
- Choose JSON format, then click Create.
- A
.jsonkey file will be downloaded to your computer. Keep this file safe! - Rename the downloaded json file to be service-account.json, upload that file to plugins/eventbooking/googlesheet/credentials folder on your site.
Share Your Google Spreadsheet with the Service Account
To allow the system to write data into your Google Sheet, you need to share the sheet with the service account just like you would with any collaborator.
- Open your Google Sheet in your browser.
- In the top right corner, click the Share button.
- In the “Add people and groups” field, paste the service account email provided to you. It looks something like this your-service-account@your-project.iam.gserviceaccount.com
- Click Add people and enter your service account’s email (e.g.,
joomla-calendar-bot@your-project.iam.gserviceaccount.com). - Make sure the permission is set to Editor.
- Click Send or Share to save.
Configure Google Sheet Settings for each event
Registrants from each event will be synchronized to a separate sheet. So you if you want registrants of certain event to be synchronized to your Google Spreadsheet, edit the event, look at Google Sheet tab, enter Sheet ID and Sheet Name there. Then registrants of that event will be synchronized to that sheet. Keep in mind that each event needs a separate sheet to store Registrants data.

How to get Sheet ID
-
Open your Google Sheet in your web browser.
-
Look at the URL in your browser’s address bar. It will look something like this:
https://docs.google.com/spreadsheets/d/1A2B3C4D5E6F7G8H9I0Jabcdefg123456/edit#gid=0
- The Sheet ID is the long string of letters and numbers between
/d/and/edit: . In this example , it is 1A2B3C4D5E6F7G8H9I0Jabcdefg123456
How to get Sheet Name
-
Look at the bottom of your Google Sheet window.
-
You’ll see one or more tabs like this:
(Example tab names: Sheet1, Leads, Orders, etc.)
- The name of the tab you want to use is the Sheet Name.
By default, this is often called
Sheet1, but you or someone else may have renamed it.
- You can rename the tab by double-clicking it and entering a new name (e.g.
Leads,Orders, orContactForm).