CSV Import / Export
[TOC]
Overview
The CSV Import/Export feature allows you to bulk-import or bulk-export property listings using standard CSV files. This is useful for migrating data from other systems, backing up property data, or managing large numbers of listings efficiently.
OS Property uses a CSV Form concept: before importing or exporting, you must define a CSV Form that specifies which fields map to which columns in the file. This gives you full control over the structure of the CSV without being locked into a fixed format.
CSV Forms
Overview
A CSV Form is a reusable template that defines the column structure of a CSV file and sets default values for fields that may not be present in the file.
CSV Forms List
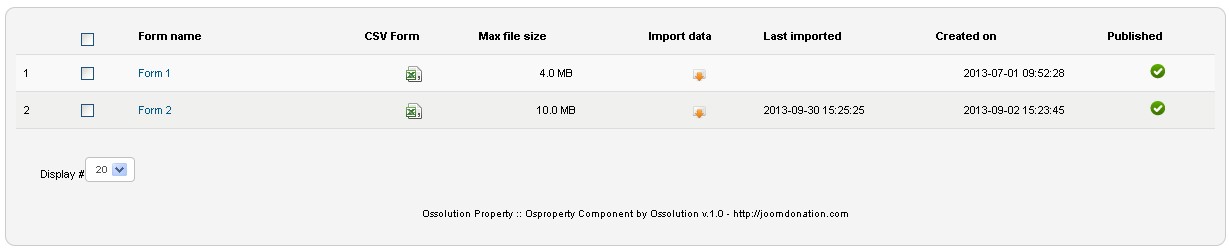
The CSV Forms list shows all defined forms. For each form you can:
- Download a sample CSV file to use as a data entry template
- Trigger a CSV import directly
| Column | Description |
|---|---|
| Form Name | Name of the CSV form |
| CSV Form | Download link for the sample CSV file for this form  |
| Max File Size | Maximum allowed size of the CSV file for this form |
| Import Data | Click to start importing a CSV file using this form |
| Last Imported | Date and time of the most recent import using this form |
Add / Edit a CSV Form
To create a new CSV form, click New. To edit an existing one, click on its name.
A CSV form has two sections:
1. Pre-defined Information
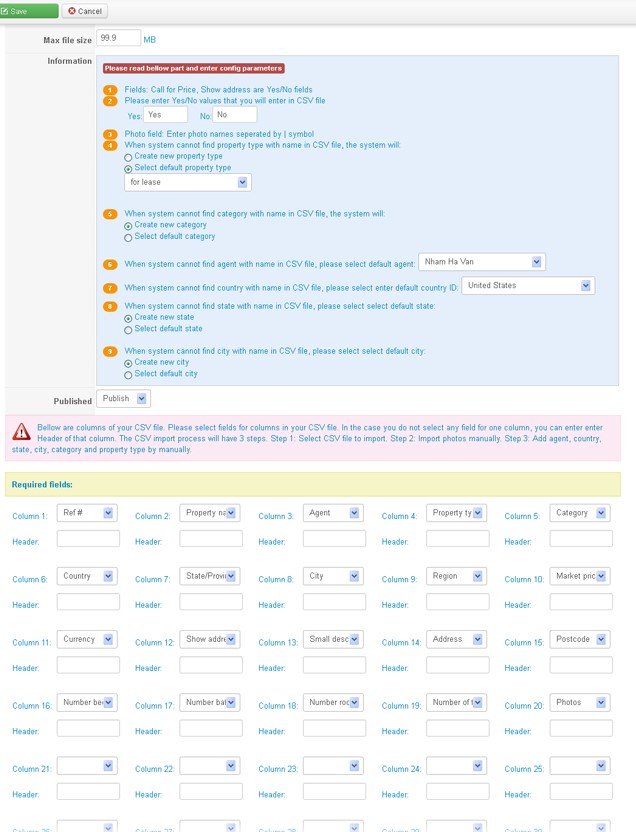
This section defines default values that the system uses when a value cannot be found in the CSV file.
| Setting | Description |
|---|---|
| Yes/No Values | Define what text in the CSV represents "Yes" and "No". This is necessary when importing files in languages other than English. For example, a French CSV might use "Oui/Non". Affects fields such as "Show Address" and "Call for Price". |
| Photo Field | Photo filenames in the CSV must be separated by the \| (pipe) character. |
| Property Type | If the system cannot find a matching property type by name, it will either create a new one or use the default type selected here. |
| Category | If the system cannot find a matching category by name, it will either create a new one or use the default category selected here. |
| Agent | If no matching agent is found, the system will assign the default agent selected here. |
| Country | Default country used when no match is found in the CSV. |
| State | Default state/province used when no match is found in the CSV. |
| City | Default city used when no match is found in the CSV. |
| Active Cron Import | Set to Yes to enable scheduled (Cron Job) import for this form. |
Note (from version 3.0.7): You can automate CSV imports using a server Cron Job. Upload your CSV file to the Joomla site and configure a cron task pointing to:
YOUR_ROOT_PATH/components/com_osproperty/importcsv.phpYou must also enable Active Cron Import on the form.
2. CSV Columns
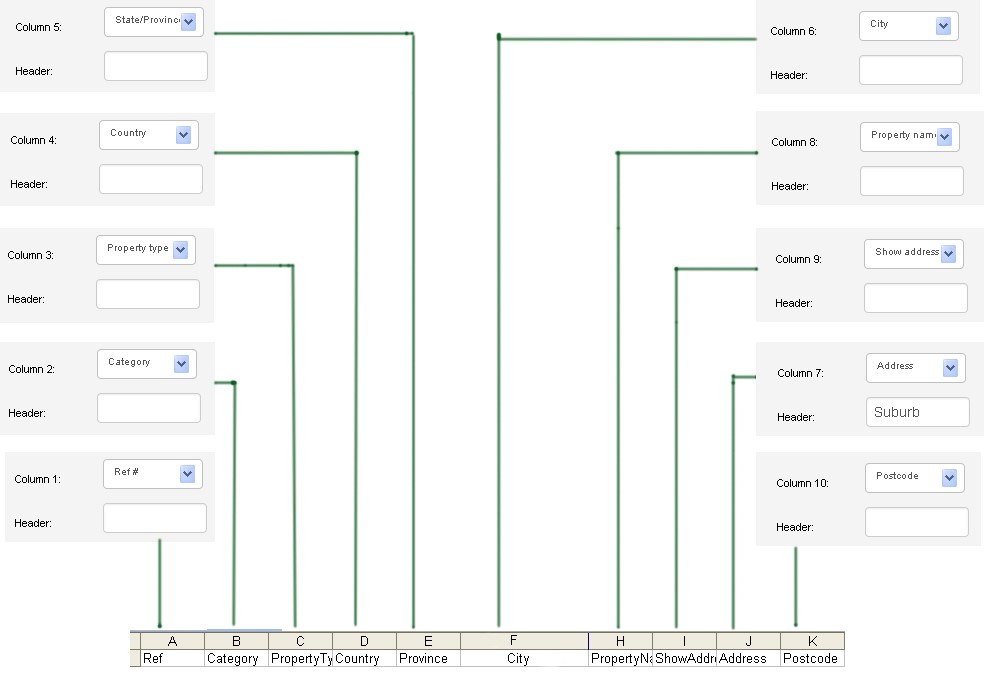
In this section, you map each column heading of your CSV file to the corresponding OS Property field. The order of the column mappings here must exactly match the column order in your CSV file. You can leave a column mapping empty to skip that column.
Importing Properties from CSV
Step 1: Select and Upload the CSV File
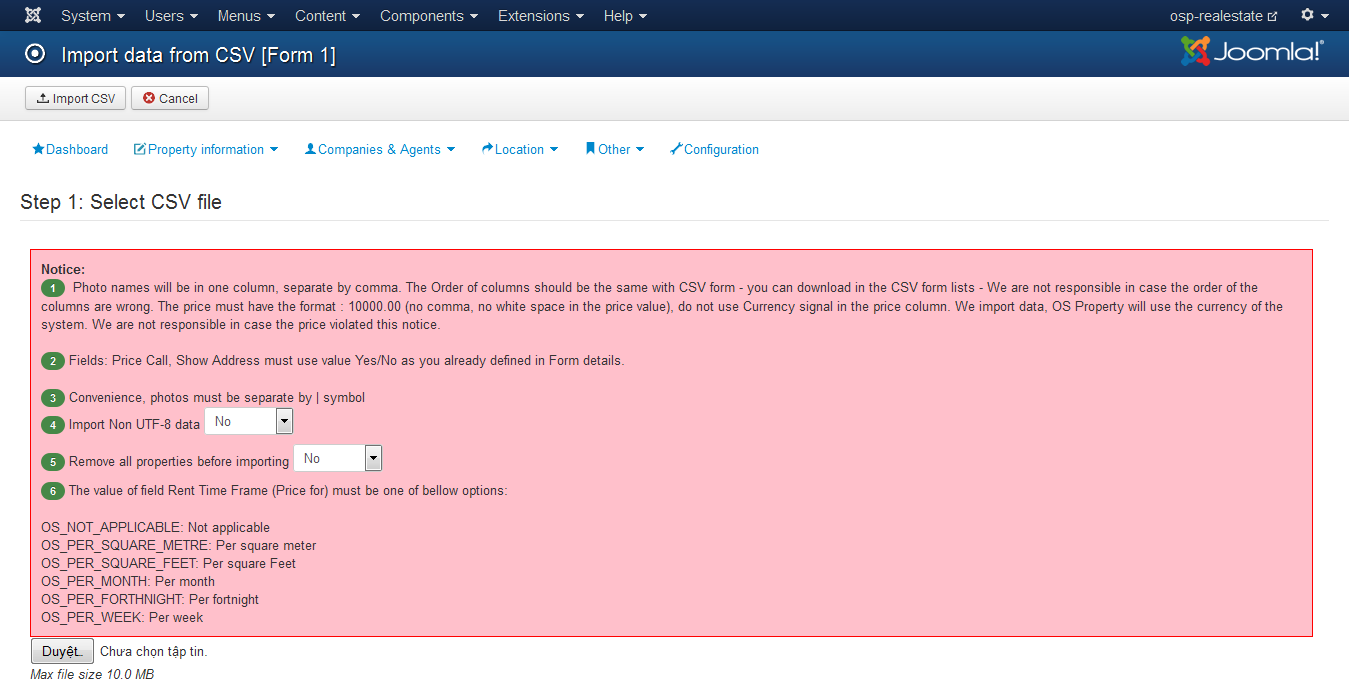
Navigate to CSV Import and select the CSV form to use. Then upload your CSV file.
Important rules for your CSV data:
- Photo names must be in a single column, separated by the
|(pipe) character. - Column order must match the order defined in the CSV form. Download the sample CSV from the form list to verify.
- Price format: Use the format
10000.00— no commas, no spaces, no currency symbols. The system uses the currency configured in OS Property settings. - Yes/No fields (e.g., "Show Address", "Call for Price") must use the exact Yes/No text values defined in the CSV form settings.
- Character encoding: Choose UTF-8 or Non-UTF-8 depending on the encoding of your CSV file.
- Remove existing properties: You can optionally delete all existing properties before importing. Use this option with caution — it cannot be undone.
- Rent Time Frame (Price For): If this field is included in your CSV, the value must be one of the following codes:
| Code | Meaning |
|---|---|
OS_NOT_APPLICABLE |
Not applicable |
OS_PER_SQUARE_METRE |
Per square metre |
OS_PER_SQUARE_FEET |
Per square feet |
OS_PER_MONTH |
Per month |
OS_PER_FORTHNIGHT |
Per fortnight |
OS_PER_WEEK |
Per week |
Step 2: Upload Photo Package (Optional)
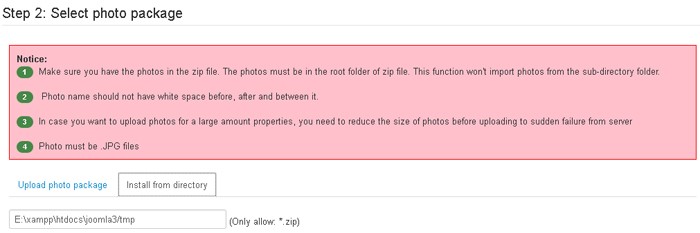
If your properties have photos, upload a ZIP archive containing all the photo files, or provide a URL to a ZIP file hosted online. The photo filenames in the ZIP must match the filenames specified in the CSV.
Exporting Properties to CSV
The CSV Export feature lets you export property listings to a CSV file. The exported file uses the structure defined by a CSV form of your choice, making it easy to re-import the data into another OS Property installation.
How to Export
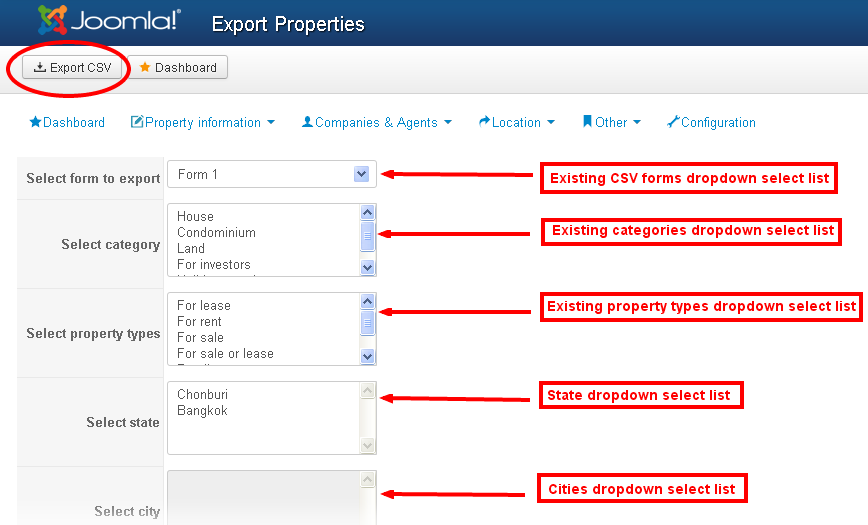
- Go to CSV Export and select a CSV form.
- Apply filters to narrow down which properties to export:
- Category
- Property Type
- Agent
- State/Province
- City
- Click Export CSV in the toolbar.
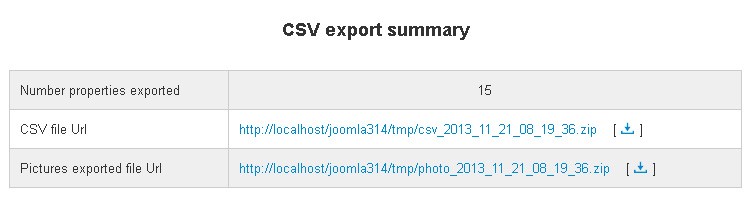
After the export is processed, the system shows a summary page with:
- The number of properties exported
- A download link for the CSV file
- A download link for a ZIP archive of all photos associated with the exported properties
You can use both files to perform a CSV import on a different OS Property system.
Note (from version 2.6.6): Importing CSV files that contain non-UTF-8 characters is fully supported. Select the Non-UTF-8 encoding option during import when your file was created with a non-Unicode encoding (e.g., Windows-1252).