Payment plugins
[TOC]
This tool is used to manage the payment plugins that will be used at front-end of OS Services Booking.
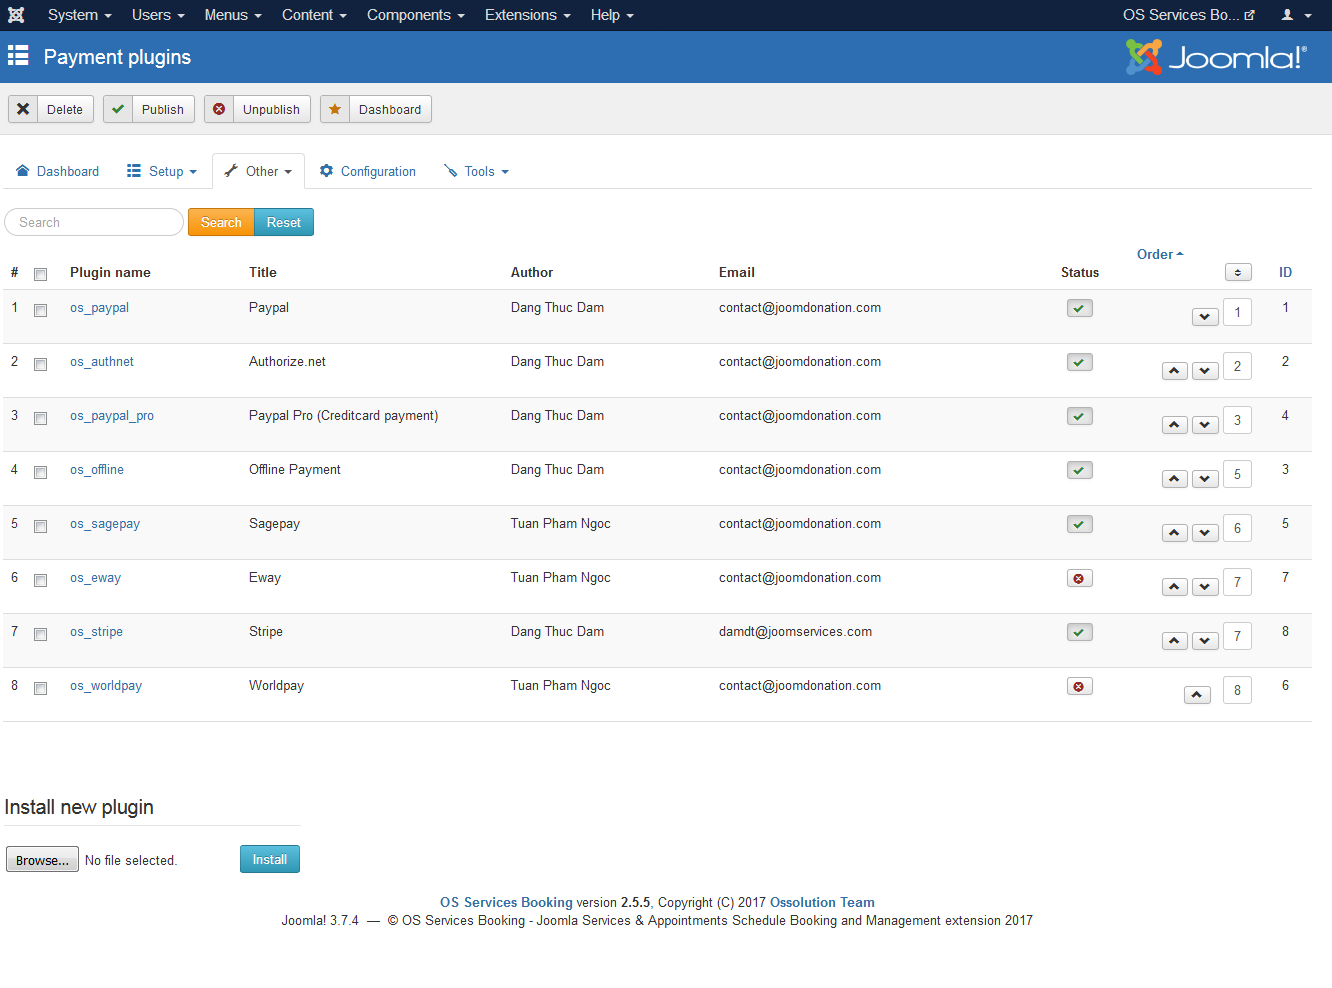 You can also create your own payment plugin and install it by using function Install new plugin at the bottom of page. Each plugin should have at least 2 files: XML configuration and php source code file. Payment plugins has Access level field, you can assign Joomla user groups that can be use the Paypal plugins.
To get more details about one payment plugin, you can check the source code of os_paypal payment plugin. Now, we will go to each payment plugin details.
Paypal
Go to OS Services Booking -> Payment Plugins, then click on os_paypal to edit it
- PayPal Mode: Set to Test Mode if you are testing the system and set it to Live Mode when you go live. Please note that if you use Test Mode, you will need to register for a sandbox PayPal account (you could not use your real PayPal account in Test Mode)
- PayPal Email: Enter the Paypal Email associated with your PayPal account
- Currency: Currency that will be passed to Paypal
Authorize.net
Go to OS Services Booking -> Payment Plugins, then click on os_authnet to edit it
- Authorize.net Mode: Set to Test Mode if you are testing the system and set it to Live Mode when you go live.
- API Login: Enter API Login that you recieve from Authorize.net.
- Transaction Key: Enter Transaction Key that you receive from Authorize.net.
Paypal Pro
Go to OS Services Booking -> Payment Plugins, then click on os_paypal_pro to edit it
- PayPal Pro Mode: Set to Test Mode if you are testing the system and set it to Live Mode when you go live.
- API Username: Enter the API Username of your PayPal account.
- API Password: Enter the API Password of your PayPal account.
- API Signature: Enter the API Signature of your PayPal account.
Paypal Pro can only be used on US, UK and Canada
Offline Payment
Go to OS Services Booking -> Payment Plugins, then click on os_offline to edit it
Offline payment plugin is a special built-in payment plugin. It allows customers to place order and make payment for the order later (not at the time they checkout for the order) by bank transfer, cash on delivery, cheque, etc.
When customers choose offline payment to checkout their booking, the system will mark the order status as Configured option (Pending, Completed) and send a notification email to customers to tell them how to make the the offline payment).
Eway
Go to OS Services Booking -> Payment Plugins, then click on os_eway to edit it
- EWay Mode: Set to Test Mode if you are testing the system and set it to Live Mode when you go live.
- Customer ID: Enter customer ID that you receive from EWay.
- Use CVN: Choose Yes if you want EWay to check valid of Card CVV Code.
Stripe
Go to OS Services Booking -> Payment Plugins, then click on os_stripe to edit it
- Public API Key: Enter the Public API Key of your Stripe account.
- Secret API Key: Enter the Secret API Key of your Stripe account.
Worldpay
Go to OS Services Booking -> Payment Plugins, then click on os_worldpay to edit it
- Worldpay Mode: Set to Test Mode if you are testing the system and set it to Live Mode when you go live.
- Worldpay Installation ID: Enter the Worldpay Installation ID.
- Callback Password: Enter the Callback Password.
Sagepay
Go to OS Services Booking -> Payment Plugins, then click on os_sagepay to edit it
- Sagepay Mode: Set to Test Mode if you are testing the system and set it to Live Mode when you go live.
- Vendor Name: Enter your SagePay vendor name
- Encryption Password: Please enter SagePay encryption Password