Default layout: Services Booking
[TOC]
Default Layout in OS Services Booking
The Default layout is the core booking page of the system. This is where customers select time slots, services, and resources to complete their booking requests.
Key Features of the Default Layout:
- Customers can book their appointments directly through this layout by selecting a service, available time slots, and resources.
- Administrators can use this layout to create bookings on behalf of customers. This is especially useful for phone bookings when customers call to schedule an appointment instead of booking online.
- Configurable display options: In the layout configuration, administrators can customize how the booking page is presented. They can filter bookings by service, resource, category, venue, time range, or specific days displayed in the mini calendar.
Structure of the Default Layout
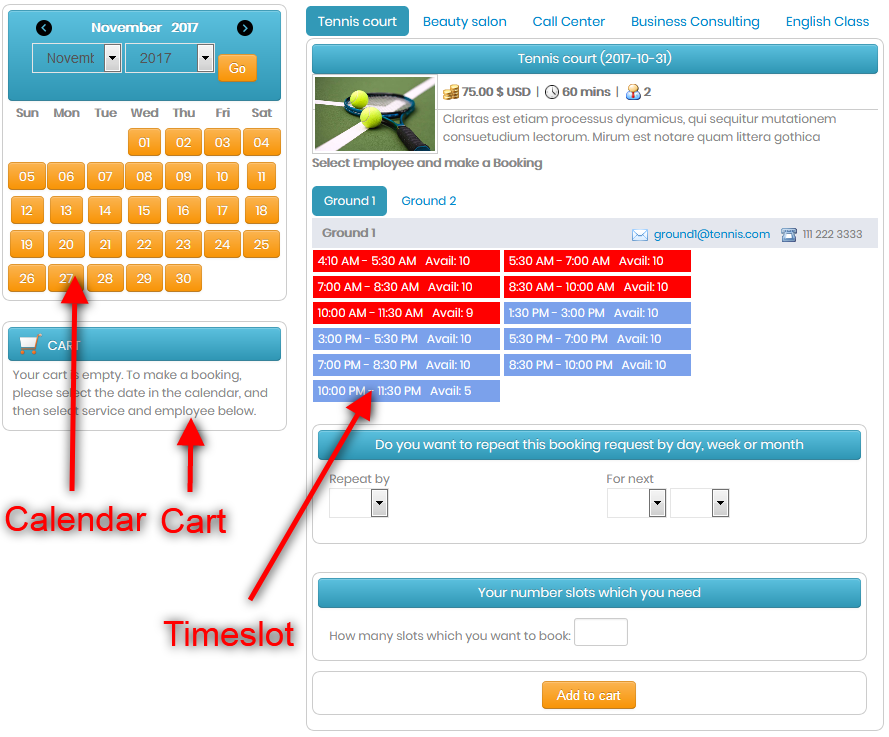
On the main booking page, you will see three key sections:
- Calendar – This allows users to navigate between different days, months, and years to find available time slots.
- Cart Box – This section displays the selected time slots before finalizing the booking.
- Main Booking Area – This contains:
- Available time slots
- Custom fields (if configured)
- Input box for number of seats (if applicable)
Time Slot Selection
There are three different ways customers can select time slots:
- Radio Box Selection – Customers can only select one time slot per booking.
- Checkbox Selection – Customers can select multiple time slots within a day.
- Simple Time Slot Layout – Similar to the radio box selection, but with a more streamlined and visually appealing design.
Once a time slot is selected, a booking summary appears at the bottom, displaying key details before proceeding to checkout.
Checkout Process
After adding time slots to the cart, customers can proceed to checkout in two ways:
- Click the Checkout button in the Cart Box.
- If the Cart Box is hidden (based on system configuration), selecting a time slot will automatically redirect the user to the checkout page.
Checkout Process Steps:
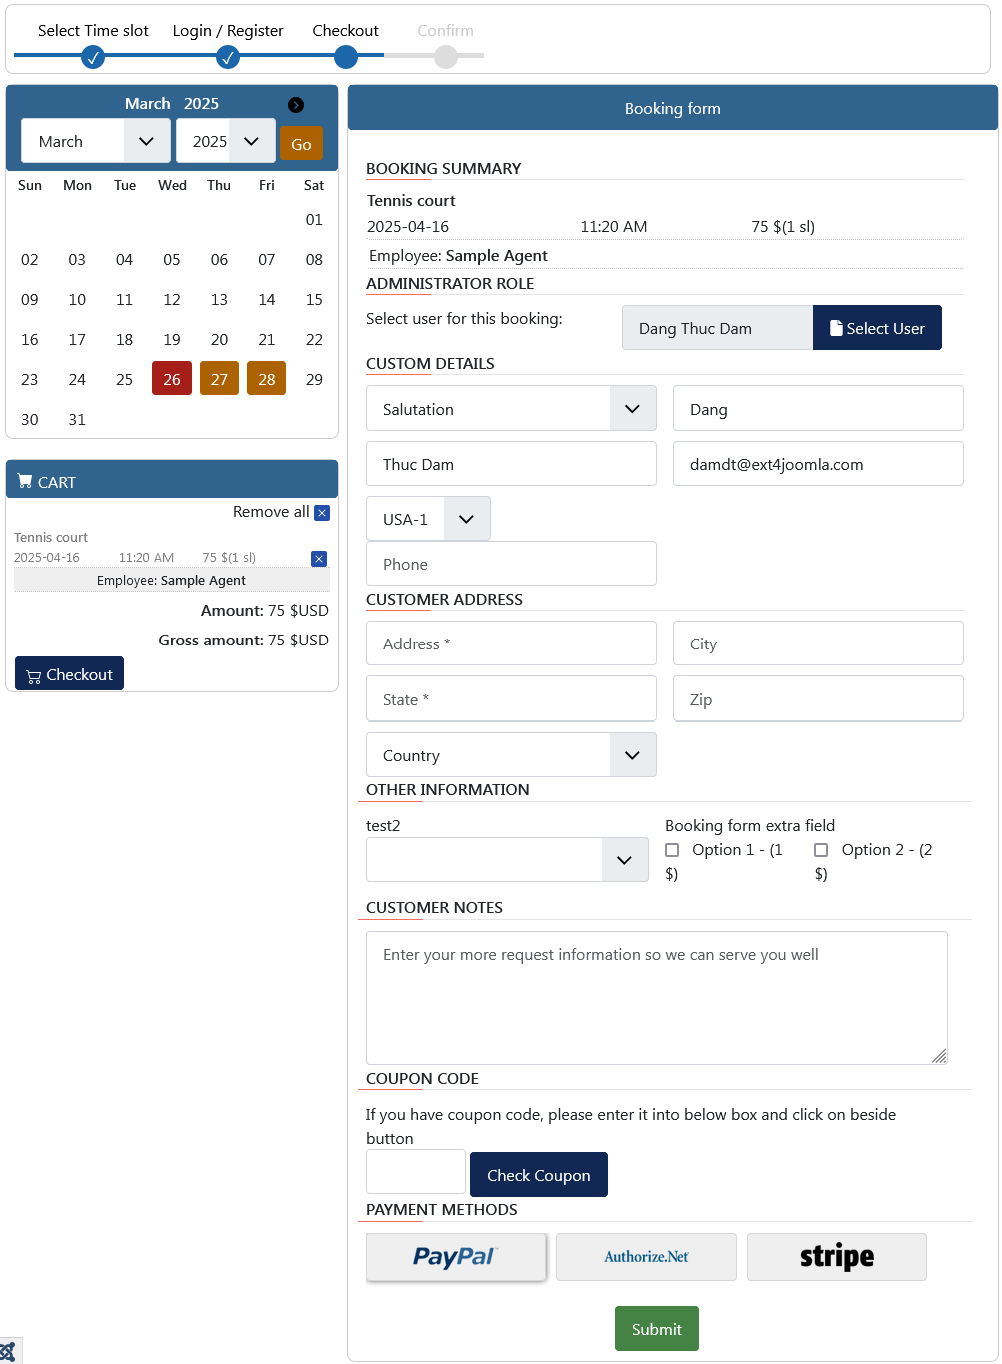
- Customers may be required to log in or register before proceeding. If login is optional, they can skip this step.
- On the Checkout Page, customers:
- Enter booking details.
- Select a payment option (if enabled).
- Apply a coupon code (if applicable).
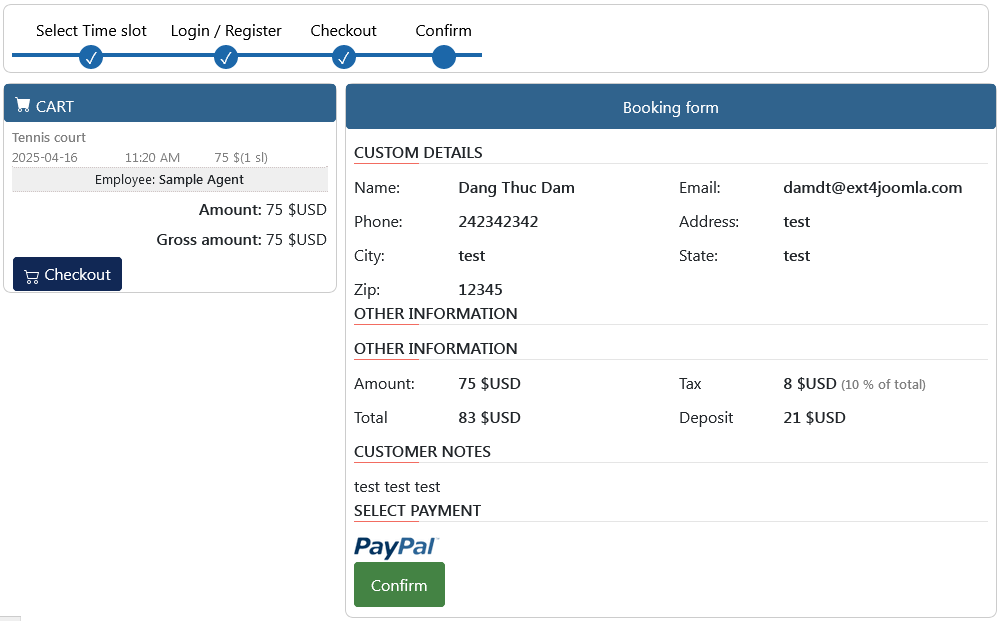
- After submitting the checkout form:
- Customers may be redirected to a confirmation page displaying their entered details.
- Alternatively, they will go directly to the Order Complete page, depending on system settings.
After Checkout: Automated Actions
Once an order is completed, OS Services Booking automatically performs several actions based on system configurations:
- Checks time slot availability before finalizing the booking.
- Calculates total costs, including additional fees if applicable.
- Saves booking details in the database.
- Sends email/SMS notifications to customers and administrators.
- Creates Google Calendar events (if Google Calendar integration is enabled).
- Generates an invoice (if the invoice feature is activated).
This process ensures a smooth and efficient booking experience for both customers and administrators.
Menu parameters form
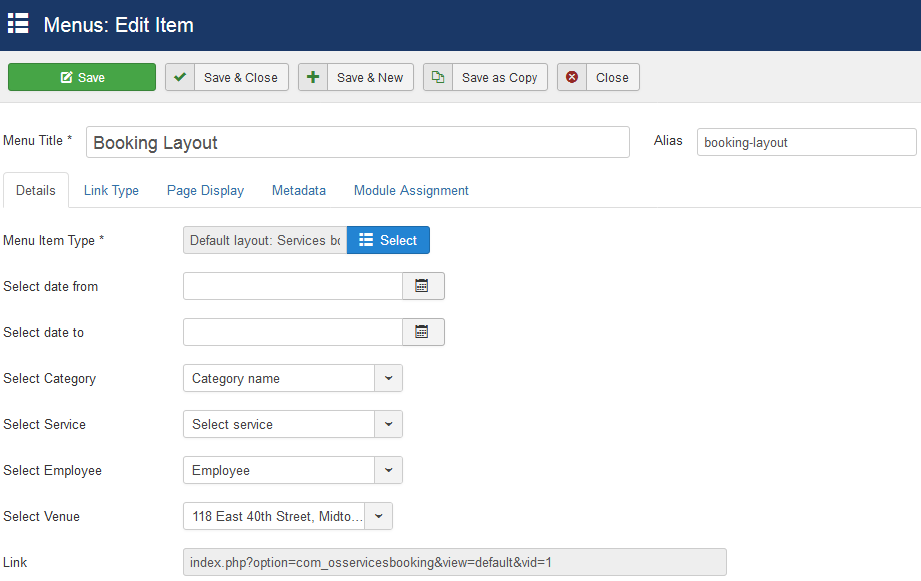
| Property | Description |
|---|---|
| Category | Select category in OS Services Booking |
| Employee | Select resource in OS Services Booking |
| Venue | Select venue in OS Services Booking |
| Date from/to | Select the time period that you want to show the Services |
On the front-end, depending on the selected options, OS Services Booking will search for the corresponding services and display them on the Booking Table page.
- If the user selects options in the dropdown lists, the system will filter and display the services that match those criteria.
- If the user does not select any options, the system will return all available services for booking.
This feature helps customers easily find and book the services that best fit their needs.