Real Estate Properties
[TOC]
Manage properties
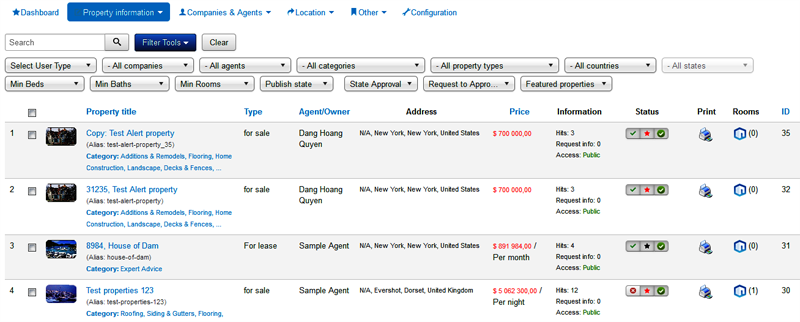 Real Estate Properties represent the listings you want to display on your website. These are the most important items in OS Property system. Above picture is the “manage properties” page
In this page, properties can be filtered by:
Real Estate Properties represent the listings you want to display on your website. These are the most important items in OS Property system. Above picture is the “manage properties” page
In this page, properties can be filtered by:
Keyword
Property title, Ref number .etc
Company
Select company that your properties are belong to
Agent
Select agent that your properties are belong to
Category
Select category that your properties are belong to
Property type
Select property type that your properties are belong to
Country
Select “country option” that your properties are belonging to. In case, at the configuration page, you select one default country. This dropdown select list won’t appeared
State
Select state that your properties are belong to
Bedroom
Select number of bedrooms that your properties have
Bathroom
Select number of bathrooms that you properties have
Room
Select number of rooms that you properties have
Publish status
You can select to show Published properties or Unpublished properties
State Approval You can select to show Approved or Unapproved properties
Request to Approval
You can select to show the properties that are pending (Waiting approval from administrator)
Featured properties
You can select to show Featured or Unfeatured properties
To add a property, click the New button in the upper right of the Properties panel. To edit a property, click on the checkbox of the property you want to edit, and then click the Edit button in the upper right of the Properties panel or you can click on the title of the property that you want to edit.
Notice :
Expired time: In the case one property is approved, it will be available for viewing in one time amount. It is field: Live time in days at Configuration page. After “live time”, the property will be unapproved. Once a listing has expired and is no longer needed, it will be removed out of database in one time amount (Field Unpublished days at Configuration page). Featured property live time: When the property is upgraded to featured. It will be in “Featured” status in one time amount, this time amount can be configured in configuration (Field Time in days (featured) at Configuration page)
Example:
At the backend, administrator set:
Live time in days: 30 days
Time in days (featured): 15 days
Unpublished time: 15 days.
And, today, 30th Dec 2013, new property is created, the property will available at front-end until 30th January 2014, and then, it will be removed out database in 15th February 2014 unless agent request to Approval the property after 30th Jan 2014 -> 14th Feb 2014.
Add/Edit properties
There are several parts in Property modification page.
1. General
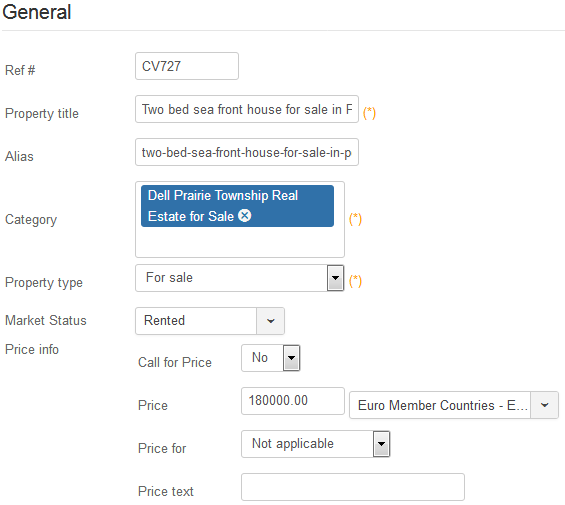
Property title
The title of the property, it’s mandatory field
Ref #
Reference number of the property, it’s optional field
Alias
Alias field of property. It must be unique. You can leave this field empty. In that case, OS Property will create the unique alias automatically.
Category
Select categories for the property, it’s mandatory field. From version 2.7.1, one property can belong to more than one category.
Property type
Select type for the property, this can be for sale, for lease, for sale or lease, for rent, pending, or sold, it’s mandatory field.
Market Status Select Market status for the property, this can be Sold, Rented, Current.
Approved
Select approval status for one property. Once the property is approved, it will be shown in the front-end of system. The live time of one property is setup from configuration page from the backend.
Publish
You can select to publish or unpublished their properties in case they need. If they select to unpublished the property, the property won’t be appeared at front-end.
Price
Price value for property
Original price
If the price of the property has been reduced or increased, you can enter old price in "Original price" field
Call for Price
If you tick this option, the price will not be displayed to users on the front-end. Instead, a "Call for Price" notice will be given with the property listing.
Currency
Currency of property. The default currency was selected at configuration page
Price for
You can select type of property’s price
2. Address
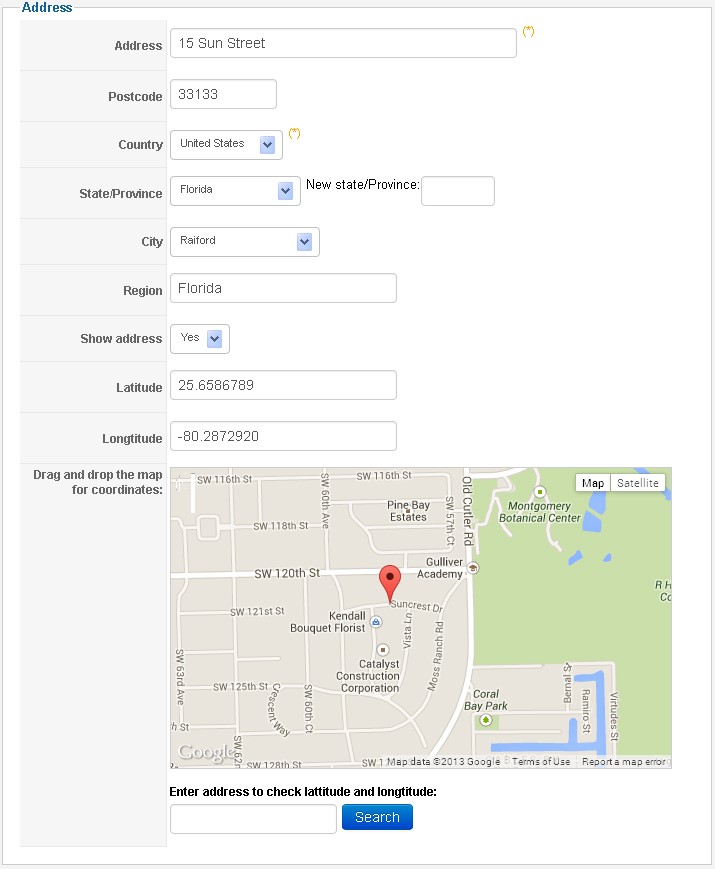
Address
Address of property. This is mandatory field.
Postcode
Postcode of property
Country
Country of property. In case you select default country at Configuration page, this dropdown select list won’t be shown
State
State of property. This is mandatory field.
City
City of property. This is mandatory field.
Region
Region of property. This is optional field.
Show address
You can select to show Address at the front-end of OS Property. If you select No, the address of property won’t be shown. And the property won’t be shown on the Google map also.
Latitude
The latitude of the listing. If you don't know the latitude, you can drag the marker on the Google Map on this page to get a valid Geocode. (Note: Zoom in to get an accurate reading).
Longitude
The longitude of the listing. If you don't know the latitude, you can drag the marker on the Google Map on this page to get a valid Geocode. (Note: Zoom in to get an accurate reading).
In the case you don’t want to drag the map, you can enter your location in the input box bellow the map, and then, click search. Your location will be shown in the map. If you can't enter Latitude or Longitude, please leave them empty. When you save the property, the system will find Latitude and Longitude addresses.
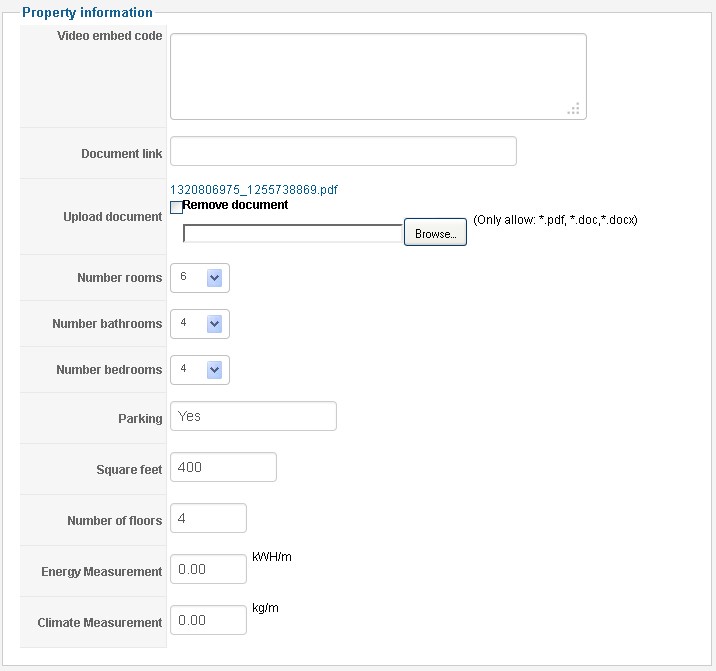
3. Property information
Video Embed code
You can copy the embed code from Video site like Youtube.com of your property.
Document link
If you have the document for the property, you can copy and paste the link to the document link input box. It will be shown in the property details at the front-end.
Upload Document
You can upload document for your property, the download link will be shown in the property details.
Number rooms
Number rooms of your property.
Number bathrooms
Number bathrooms of property. It’s Decimal value.
Number bedrooms
Number bedrooms of property
Number of floors
Number floors of property
Parking
Parking information
Square feet
Square feet information of property. You can use task: translation labels to change Square feet to Square meter if you need
Lot size Enter Lot size information of property
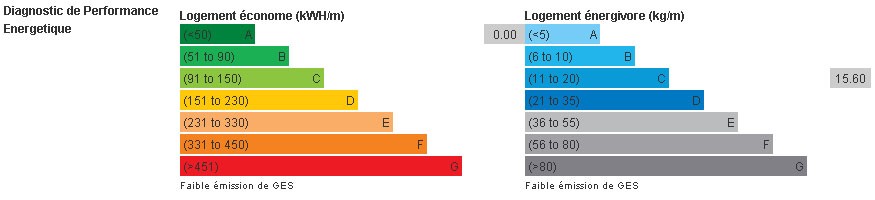
Energy Measurement
Customers from EU countries complained with us that the Energy Measurement use and CO2 emissions standards of their countries are different with the indexes at the Energy Measurement use and CO2 emissions standards graph of OS Property.
4. Other information
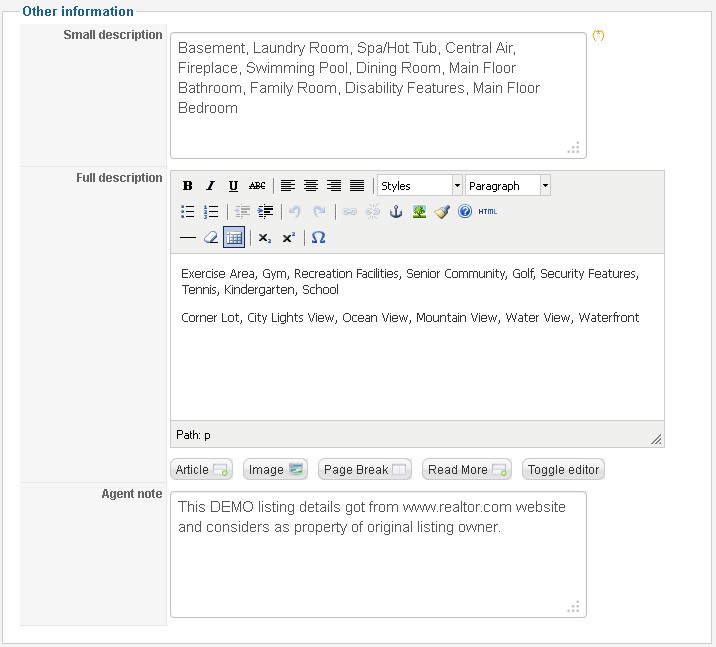
Small description
The general description of your property, it will be shown in the random properties module.
Full description
The full description of your property
Agent note
If agent has other information for customers, agent can enter those information to agent note
5. Information
Show information of real estate property
ID
ID of property
Request Info
Number request more information about property times
Hits
Number visited times of property
Rating
Rate of property
Status
Publish state of property

6. Meta information
Meta description : This section of data allows you to enhance the meta tags in the page header, and the 2 included here are the meta description and the meta keywords.
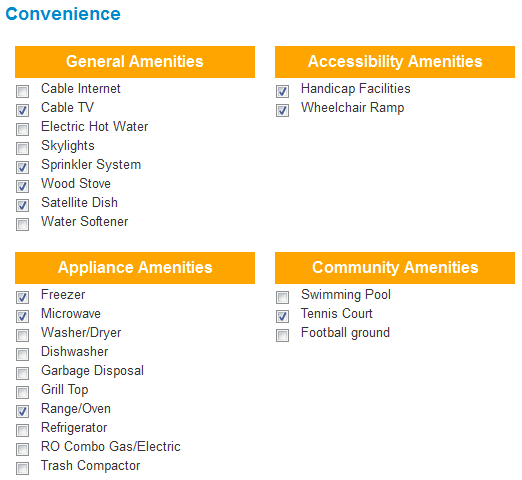
7. Convenience
There are several amenities in the OS Property system, you can select them for your property. In the case you want to add amenities, you can go to convenience manage from backend of OSP
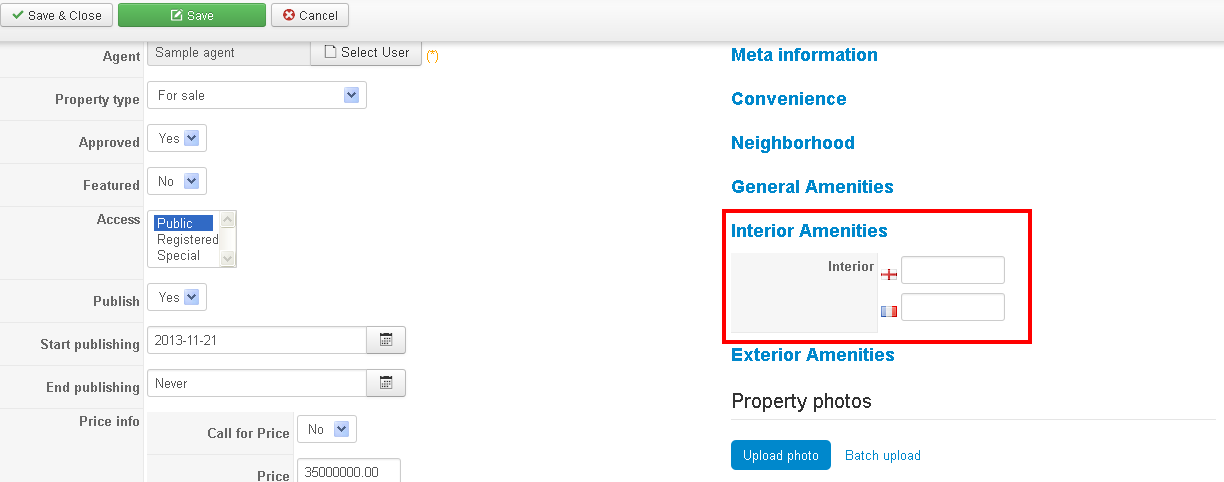
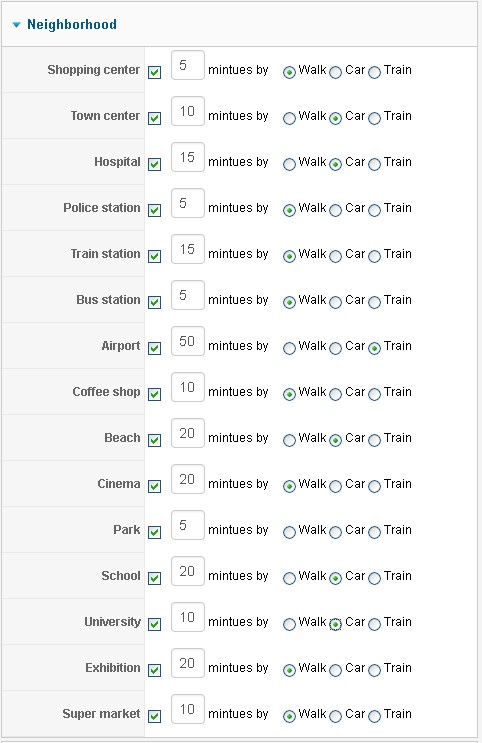
8. Neighborhood
The neighborhood slide is for inserting information about favorite and common places and distances from the property location such as a university, airport, hospital, etc. By checking each item, a line of fields will appear to get the required information for that place:
9. Extra field information
If you have created the extra field groups and extra fields, you can enter information for your property through those extra fields.
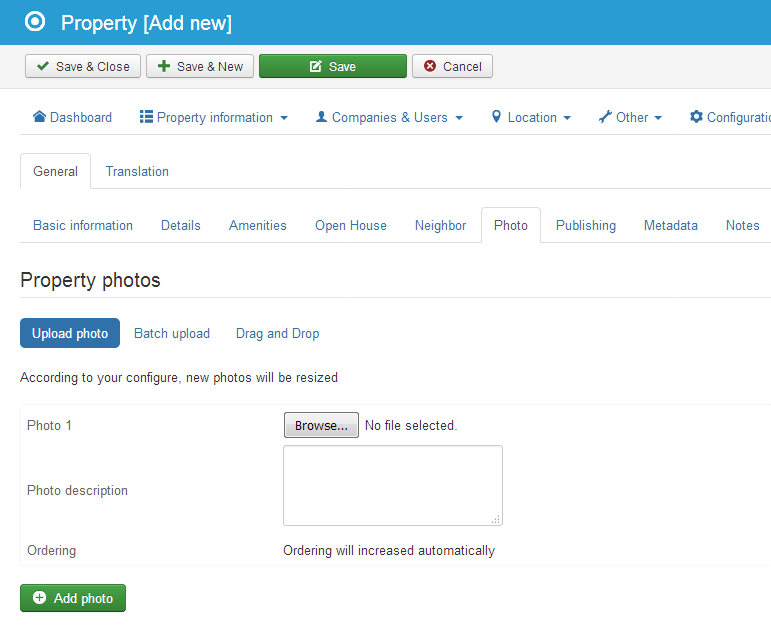
10. Photos
You can upload photos for one property, with each photo, you can add photo description, and ordering in case you need to show the photos in the sequence with the description. The number of limit photos is configured in Configuration page
Batch upload
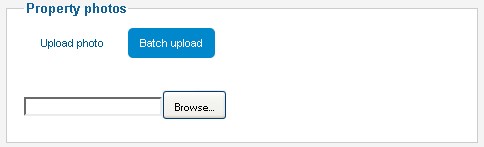 Normally, if you want to upload one picture for property, you need to select the picture from your computer, and then, you should enter the description. In this way, you can control and track the each picture of property. But you need to spend a longer time to upload all pictures of property. We have another solution to reduce your working time in this part. You can compress all photos into one zip file. And upload it in the Batch Upload form in Property photos part. After selecting and uploading the zip file, you will be redirected to the page where OS Property will list all pictures in the zip file
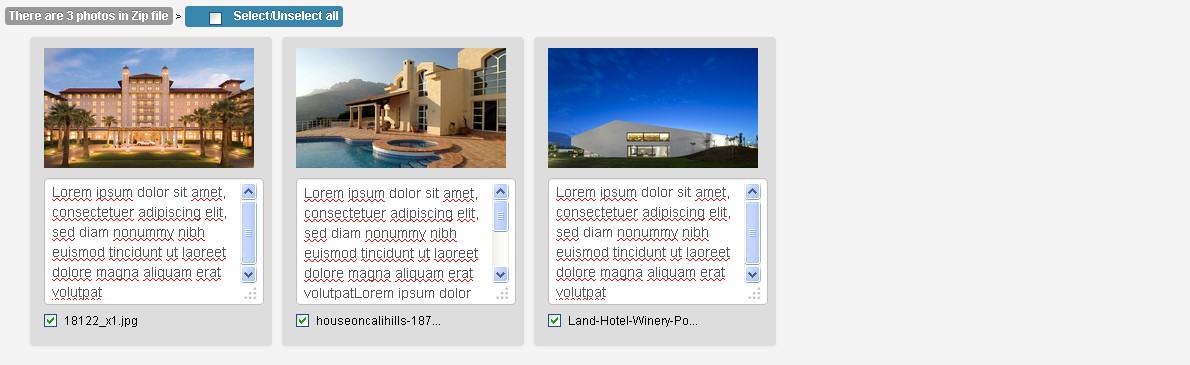 In this page, you can select to upload one, more or all pictures in the zip file, you can also enter the description for each picture easily. In the toolbar at the top, click Save & Close to complete the pictures uploading process.
Ajax Upload
This feature allows administrator to upload pictures of properties through Ajax mode. It’s quick and easy functionality


Photo resizing
OS Property provides 2 photo resizing solution: Auto and Manual resize. You can read more about them at Configuration > Tab Images.
We mention to Auto resizing function first. When you upload one picture with size : 600 x 400 (pixel), and you want to have the thumbnail picture with size : 150 X 150. If we only resize the original picture depend on the size of thumbnail picture, the result is distortion picture. The solution for this case is OS Property still creates one picture with size: 150 X 150 with background is configured at configuration page > Tab images, and then, it will resize the original picture to smaller picture depend on the rate between the smaller size (width or height) (in this case is height size) of original picture with the corresponding size of thumbnail picture. And then, the system will put the resized picture to the center of created thumbnail picture. And the result is we will have the thumbnail picture with size: 150 X 150 as configured and it won’t be distorted. Please take a look at bellow comparison picture to see the solution.
Case 1: Resize without adding space
Original picture  Thumbnail picture
Case 2: Resize and adding spaces
Original picture  Thumbnail picture
Come back to Configuration page, Tab Images, field Resizing. You will see 3 options:
1. Auto resizing without cropping image:
In this case, the pictures will be resized and added the spaces into medium or thumbnail pictures. The background color of spaces can be changed at field “Background color of medium and thumbnail photos”.
2. Auto resizing with cropping image:
In this case, the pictures will be resized without adding spaces into medium or thumbnail pictures. Of course, by this way, the picture will be cut up some excess parts based on width and height size of medium and thumbnail pictures.
3. Manual resize:
With this solution, user will create medium, thumbnail pictures by dragging and dropping the frames on the original photo. When you use this configure option, the system will create the extra step after saving property information. And user is able to drag and drop the frame on the original picture to create the resized picture. See bellow:
 By this way, the resized pictures won’t have the space on left, right – top, bottom. Please see bellow comparison.
Auto-resize  Manual resize
  Clearly, the Manual resize function provides the better quality of thumbnail and medium pictures. But please think carefully before using it, because you will need to spend time to create the resized pictures.
11. Property History & Tax
This functionality allows administrator or agent/ owner to add the Hisory Sold price and Tax information of properties. 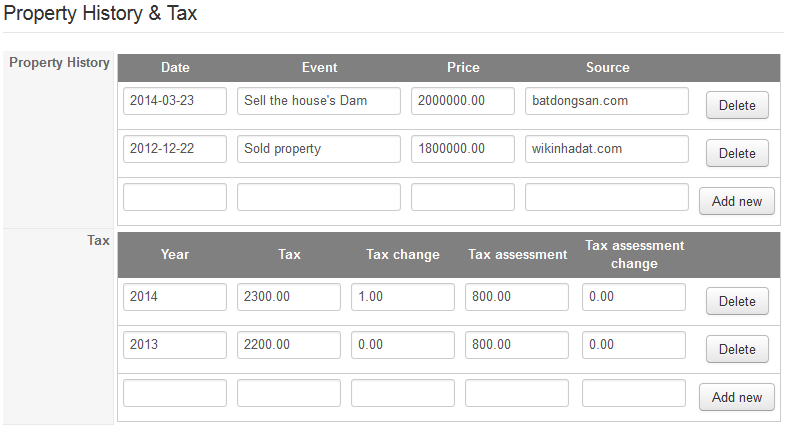 And show them at front-end > Property details page like this
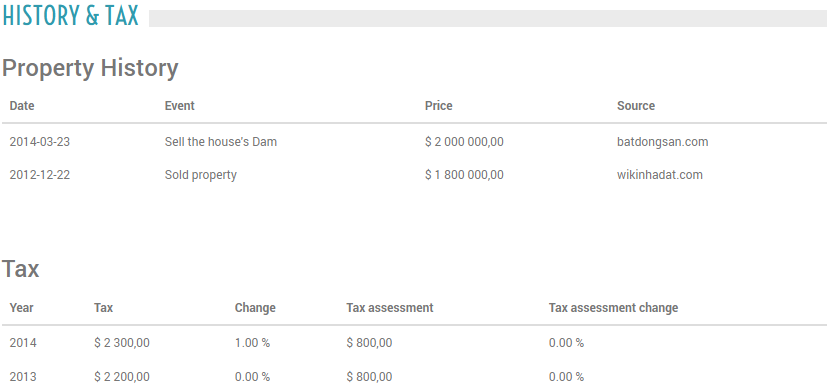
12. Open house time
Open house (real estate), a free, one-day event held by a real estate agent to show a listed residential property to any interested parties. From this version, administrator and owner are able to enter the "Open House" for their properties, and it will be shown at the front-end, in Properties listing page and Property details page. 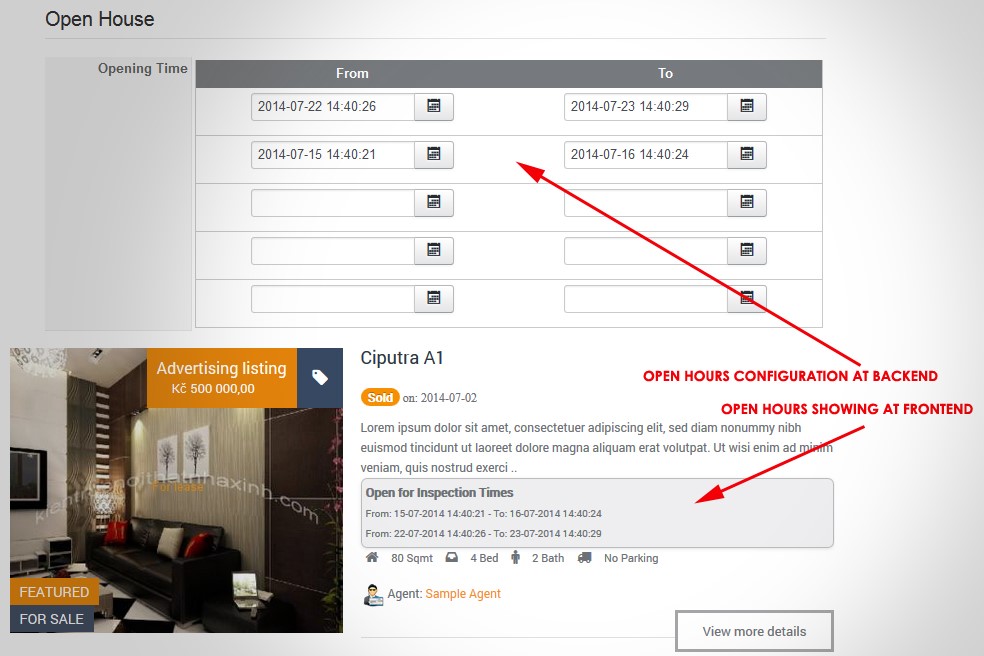
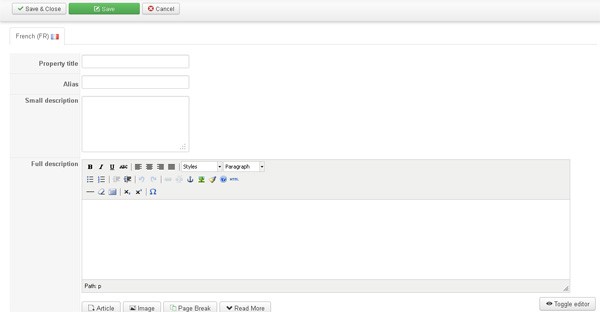
13. Multiple languages
When you have more than one language, we will have one more tab in property modification page, it’s called Translation. In this tab, system will list all available languages (in other tabs) but except main language (in Main tab)
In each Language tab, we will have bellow fields:
Property title
Alias
Small description
Full description
Note: If you only enter data for property in default language. After saving, the data will be copied to all other available languages.
In additional, when you add/edit property, you should enter data for custom fields. There is not any problem with “options” extra fields like checkboxes, radio boxes, and multiple select lists, single selects. But with “text” extra fields, you must enter data in all available languages of your Joomla site.