Config/Install Payment Plugins
[TOC]
In order to receive donation from donors, you will need to have a merchant account of payment gateways such as Paypal, Authorize.net, Eway, Worldpay...... In Joom Donation, each payment gateway is implemented as a Payment Plugin. There are 5 payment plugins come with the extension by default. They are Paypal, Authorize.net, Money Booker, Worldpay and Offline payment plugins. Other payment plugins don't come with the extension by default, so you will need to purchase it if you want to use it. You can see list of extra payment plugins at https://www.joomdonation.com/payment-plugins/joom-donation-payment-plugins.html. Go to Joom Donation => Payment Plugins to manage these payments plugins.
Unpublish the payment plugins you don't use
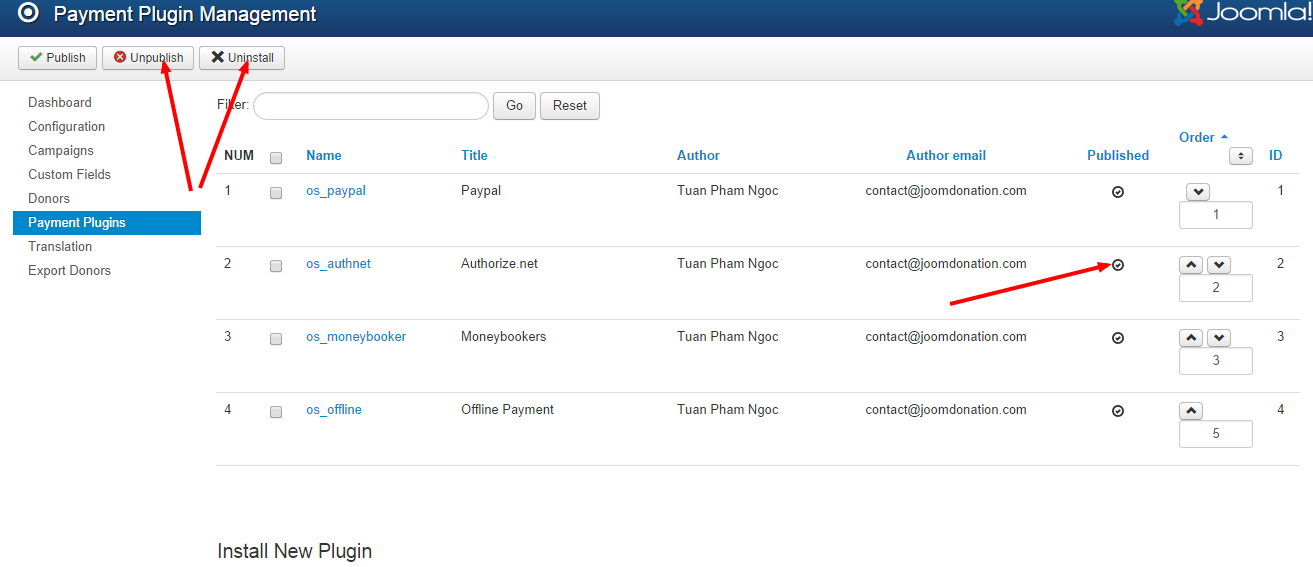
As mentioned before, Joom Donation has 5 payment plugins come with it by default and in most case, you won't use all of them. So you will need to unpublish (or uninstall) the one you don't want to use. I would suggest you to just unpublish instead of uninstall because you might want to use it in the future (who knows?). To unpublish a payment plugins, there are two ways (see the above image - look at the red arrow to understand what I meant):
- Click on the green (published) icon in the Published column.
- Check on the checkbox next to the payment plugin, then press Unpublish button in the toolbar
Config the payment plugins you use on your site
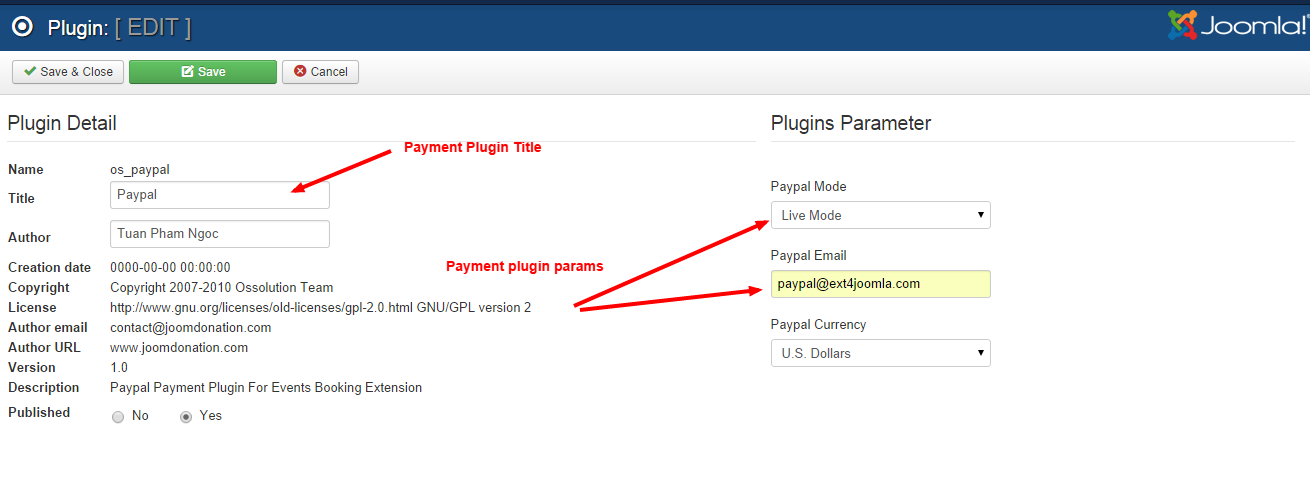
After unpublishing the payment plugins you don't use, you need to configure the one you will be using. Usually, you would like to change the title of the payment plugin and entering the payment plugin parameter (for example, with Paypal payment plugin, you will need to enter your Paypal Email account, set it to use Test Mode or Live Mode....)
To do that, just click on the payment plugin you want to change, enter the information you want and press save button in the toolbar.
Install new payment plugin
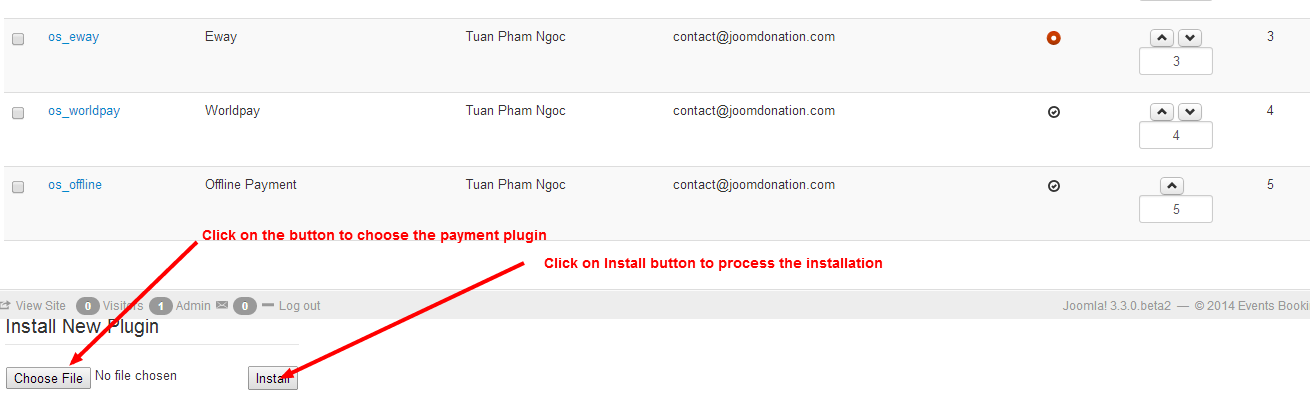
Sometime, you will need to use a payment plugin which doesn't come with Joom Donation by default. In this case, you might have to purchase these payment plugins at https://www.joomdonation.com/payment-plugins/joom-donation-payment-plugins.html (if it is available) or develop it yourself (or hire someone to develop it for you). Once you got the payment plugin, you will need to install it. To do that:
- Go to Joom Donation -> Payment Plugins
- Scrool to bottom of the page.
- Click on Choose File button to browse for the payment plugin
- Click on Install button to process the installation.
Main JD Payment plugins
1. Offline payment
Offline payment plugin is a special payment plugin comes with the extension. It allows users to donate for you but actual make payment for the donation later (not at the time they donate for you on your site) by bank transfer, by cash... at a later time.
When users choose offline payment for the donation, the system will mark the donation record as Pending. It will also display a message which guide users how to make payment.... This guide will also be sent to them via email.
So if you use Offline payment plugin, you will have to check and change the message to guide them how to make payment. For example, including your bank account information so that they can transfer money to your bank account. To do that, please follow the instruction below:
- Go to Joom Donation -> Configuration, look at Messages tab
- Find the two messages below, change it to meet your need:
- User email body (offline payment)
- Thank you message (offline payment)
2. Paypal
On Payment Plugins management screen, click on os_paypal payment plugin to edit it. The following parameters need to be configured:
- Payment Mode: Set to Sandbox (for testing payment) or Live Mode (for real payment).
- Paypal Email: Enter the Paypal Email associated with your Paypal account.
- Payment Processing Fee ($): If you want subscribers to pay for payment processing fee (a fixed fee amount), enter that fee into this parameter.
- Payment Processing Fee (%): If you want subscribers to pay for payment processing fee (a percent fee amount), enter that fee into this parameter.
3. Authorize.net
On Payment Plugins management screen, click on os_authnet payment plugin to edit it. The following parameters need to be configured:
- Authorize.net Mode: Set to Test Mode if you are testing the system and set it to Live Mode when you go live.
- API Login
- Transaction Key
- Payment Processing Fee ($): If you want subscribers to pay for payment processing fee (a fixed fee amount), enter that fee into this parameter.
- Payment Processing Fee (%): If you want subscribers to pay for payment processing fee (a percent fee amount), enter that fee into this parameter.
4. Stripe
Click on the payment plugin to edit, enter payment plugin parameters, then publish it. You can follow instructions at https://stripe.com/docs/keys#api-keys to get API Keys from your Stripe account to enter into payment plugin parameters.
If you use recurring subscription plans, you will need to login to your Stripe account, add a "Webhook URL" below (see https://stripe.com/docs/webhooks/setup#add-endpoint-dashboard for instructions to add webhook)
https://domain.com/index.php?option=com_jdonation&task=recurring_donation_confirm&payment_method=os_stripe
(Of course, need to replace https://domain.com/ with your website url)
Stripe will also asks you for the event for webhook, just select charge.succeeded in this case
5. Stripe Checkout
Click on the payment plugin to edit, enter payment plugin parameters, then publish it
- For API Keys, you can follow instructions at https://stripe.com/docs/keys#api-keys to get it.
- For Signing Secret, you need to setup Webhook URL (see the next step) and get the information from there. In the webhook URL setting, click on "Click to reveal" button to get it.
You will need to login to your Stripe account, add a "Webhook URL" below (see https://stripe.com/docs/webhooks/setup#add-endpoint-dashboard for instructions)
https://domain.com/index.php?option=com_jdonation&task=recurring_donation_confirm&payment_method=os_stripecheckout
(Of course, need to replace https://domain.com/ with your website url) Stripe will also asks you for the events for webhook, select two events below: checkout.session.completed and invoice.payment_succeeded
Stripe and Stripe Checkout
The difference:
- The JD Stripe payment plugin allow users to enter credit card payment information directly on your site for processing payment.
- The JD Stripe Checkout payment plugin redierct users to Stripe website for processing payment.
Which one to use
- If your business is affected by SCA requirement https://stripe.com/docs/strong-customer-authentication#impacted-businesses, you need to use JD Stripe Checkout payment plugin to be compatible with that requirement
- Otherwise, just use JD Stripe payment plugin. It allow customers to enter credit card information directly on your site for processing payment, so it's easier and faster for customers to pay for event registration on your site.